Setting Up Your Scanner
Step 1. Download the latest PictureStudio software installer from the following links.
Step 2. Run the installer once your download is complete. This download contains PictureStudio software and your scanner driver. Please follow the onscreen instructions.
Step 3. Connect Your Scanner.
NOTE: Before installing the software and connecting the scanner, please remove the protective insert from the paper tray of the scanner.
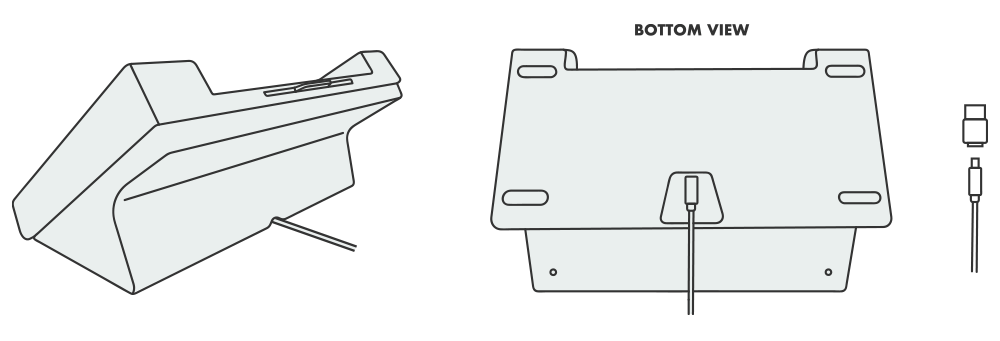
When installing the software, you will be prompted to connect your scanner. Use the included Mini-USB to USB-C cable to connect your device: plug the Mini-USB end into the scanner (refer to the illustration below) and the USB-C end into an available port on your PC. If your PC does not have a USB-C port, use the provided USB-A adapter.